Problem
Changing the default DNS Name server in Gandi should be a trivial task. However, if you follow the official guide from Netlify, you will lose Gandi's Email service(since nameserver now pointing to Netlify, you are not able to maintain a customized DNS record).
I'll provide you a step-by-step guide of how to correctly point your DNS record from Gandi to Netlify, so that people can reach your Netlify website through your domain name. In the meanwhile, keep the Gandi Email service working, you can use your sweet email address: you@yourdomain.com provided by Gandi for free.
This blog was inspired by this Netlify Community post.
Now, let's get started!
Find your Netlify nameserver
- Login to your Netlify account
- Navigate to Domain tab (fig. 1)
- Find
#dns-settingssection, remember your app URL (fig. 2)


Add new DNS records in Gandi
- Login to your Gandi account
- Access your domain panel and select the domain name your want to manage.
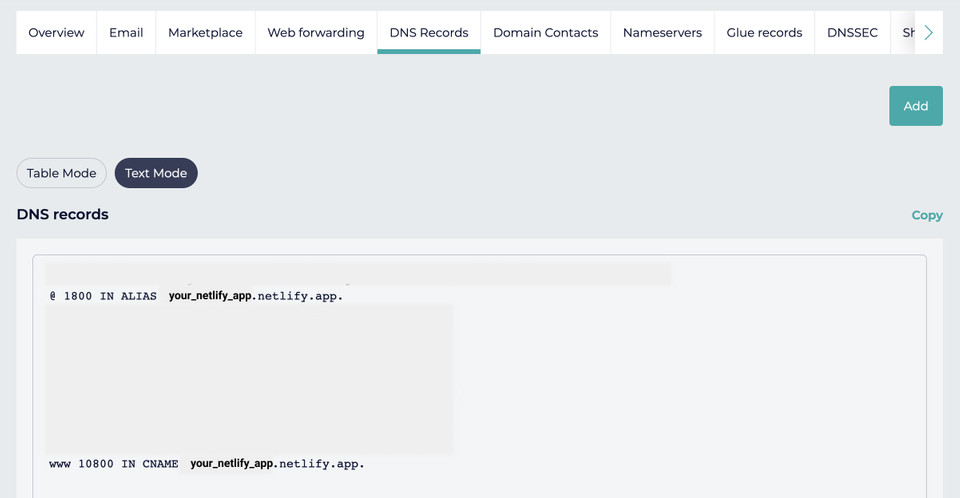
- Navigate to DNS records tab, I prefer editing the record in Text Mode
- Add these 2 records(the URL copied from fig. 2) into your setup (fig. 3), make sure you didn't miss out the dot at the end of the records
1@ 1800 IN ALIAS your_netlify_app.netlify.app.2www 10800 IN CNAMES your_netlify_app.netlify.app.

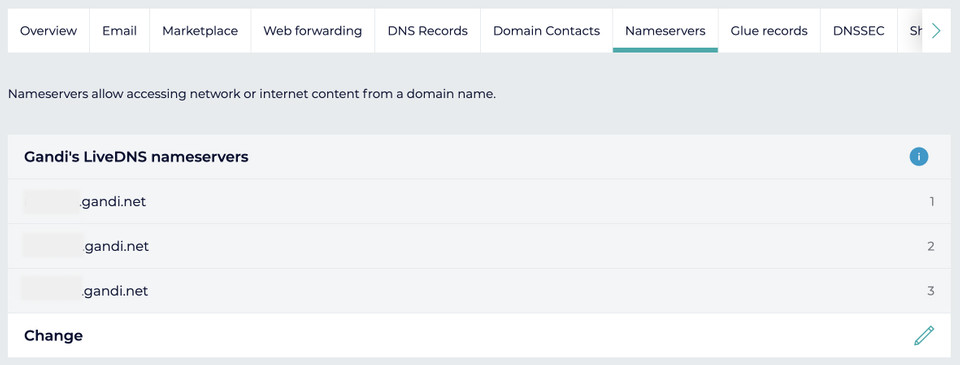
Leave the DNS Nameservers as it is
Forget about what Netlify guide indicates, you can safely ignore the DNS Nameservers setup and leave it as default(fig. 4)

Conclusion
Now you can go set up your email account and try out the POP3/IMAP Account(For incoming email) and SMTP Account(For sending email) provided by Gandi.
I hope this simple guide helps you setup your DNS redirection, and please feel free to connect me on Twitter :)